Fixture Page
Fixtures are where Sytewise's power comes in full display. A property manager manages fixed assets (Fixtures) and their detailed parts by entering critical information for fixtures and the maintainable parts of any fixture. Simply as a reference this is a substantial resource. But when coupled with Sytewise's Work Orders not only do you have reference you have history and performance.
The Fixture Page Sections
Fixture Details Section
Fixture Details
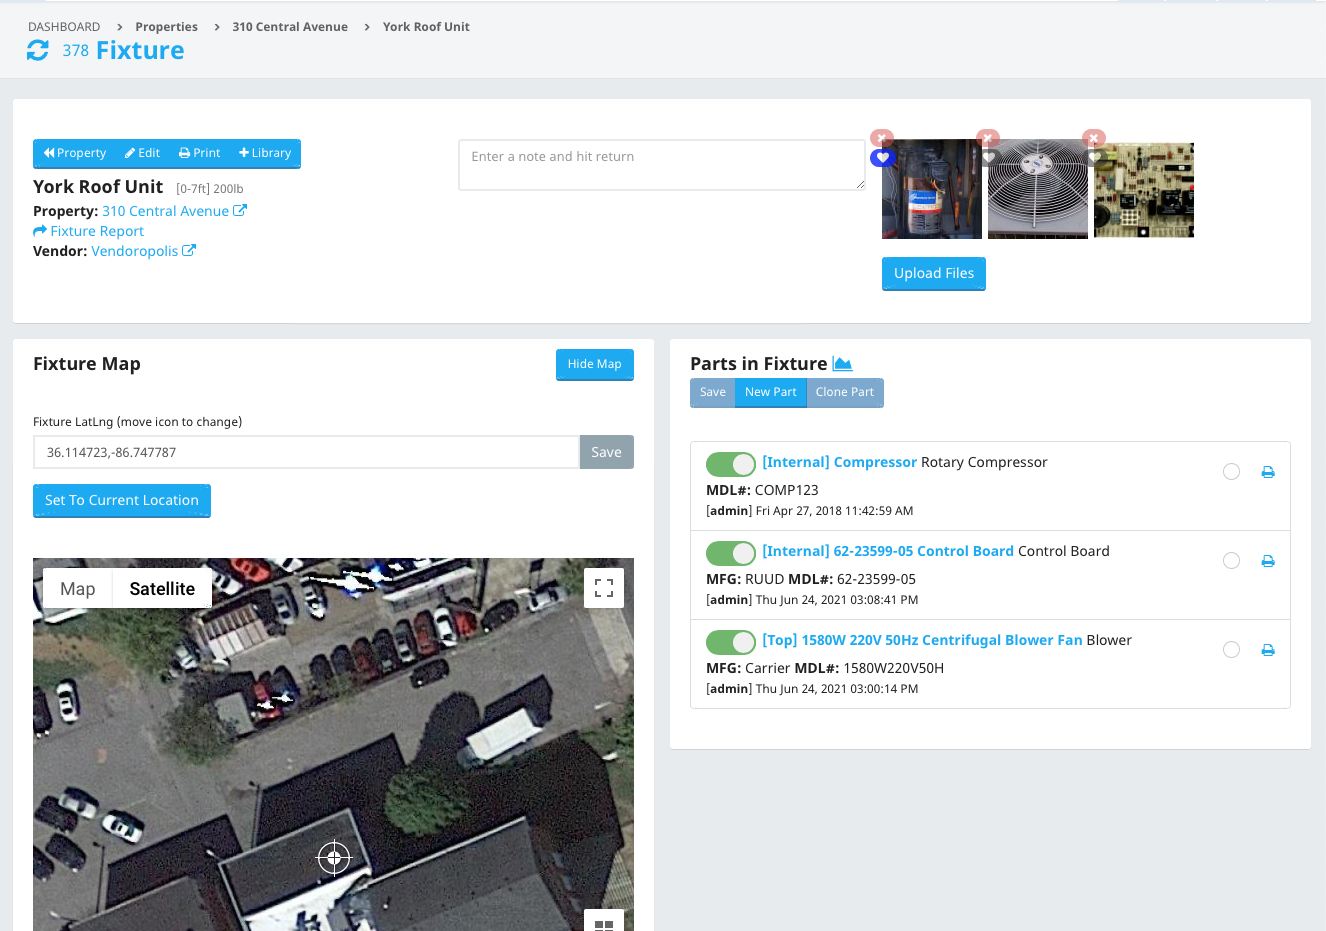
This section includes editable detail fields for your fixture including the title, description, installation notes and the default vendor among other characteristics.
The middle portion is for notes.
Enter a note and hit return to save it. You can delete or pin saved notes.
The right portion is for uploaded files.
You can upload images (gif, jpg, and png) and PDF files. When you've uploaded a file a thumbnail appears. Clicking the middle of the thumbnail opens images in a popover modal with the original filename at the bottom. Clicking a PDF opens the file in a new browser window from which you can save the file to your local computer.
Click the "Heart" icon in the upper right of any thumbnail to make it the primary image that shows up on the printed summary of the fixture and places it as the first file in the thumbnail grid of files.
Fixture Map
The Fixture Map is where the map or floorpan marker is located in context. Fixtures are on either GPS or Floorplan maps.
For GPS Property / Trades Markers
The marker is located by GPS coordinates. The fixture selected will be the larger marker in the center of the map. To relocate the marker click and drag the marker to it's new location. If you have trouble grabbing the marker place your mouse over it's edge and wait a couple seconds. If a "Move Me" label appears, move the marker to your desired location on the map.
Once the marker is at the desired location find the red "Save" button above the map. It will show the new coordinates of your marker. Click save.
For Floor Plan Markers
When the Property / Trade has an uploaded Floor Plan you can move and save the markers in the same way. Just find the larger marker and click and drag it. (The other, smaller makers are not "draggable). Make sure you save the new location before leaving the page.
The Parts List
The parts list is an at a glance view of all the parts in a fixture with tools for managing the list. Each part lists a summary of the data for that part including
- [The Position] in brackets. Position is a short text field that let's you reference how to differentiate similar parts. Uses include "Top", "Southwest", "A", "Internal" etc.
- Part Number is the next field, or the name of the part. Both position and Partno are links to open the detail part editor.
- Description is on the end of the first line.
- Manufacturer and Model Number are on the second line.
- Recent Activity is on the bottom
Managing, Editing Parts
Status Change
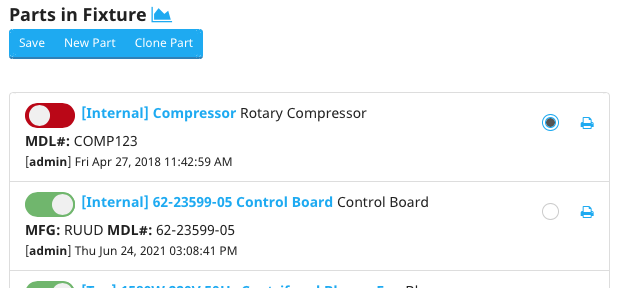
A part can have one of two status's. On or Off. "Good" or "Bad", "In Service" or "Out of Service". You can change this status by clicking the Red or Green status toggle and clicking the "Save" button above the list. This will be logged as an Admin change to the status of that part and fixture status.
Surveys and Work Orders are the most common way part status's get changed although an admin has the authority to make those changes within the Sytewise master system.
To Clone A Part
- Select the part to clone by checking the radio choice on the right side of the part listed. It's to the left of the print icon.
- Click "Clone Part" at the top of the list to open the clone part modal window.
- Give it a Position and a new part number if necessary.
- Save.
- This will create an exact clone of the part with all the details.
- Open the new part to edit any differences.
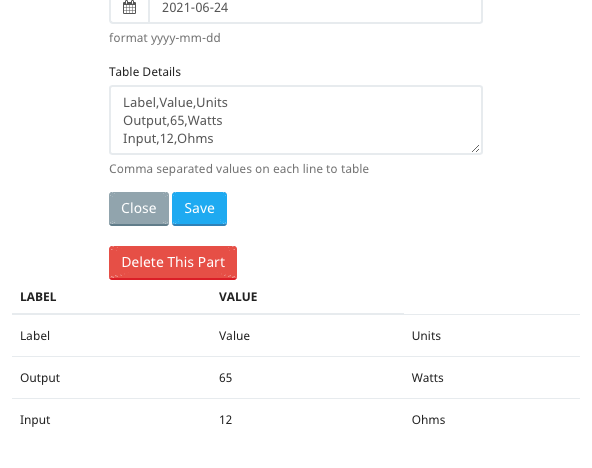
To Delete A Part, open the edit modal and click "Delete This Part"
Part Details
If the fields made available to you in the parts details are not enough for the information you wish to add to your parts, Sytewise gives you a simple tool for adding a table of data for your parts.
To add a detail table to a part do the following:
- Open a part detail editor by clicking the part name or position
- Find the field labeled "Table Details"
- Enter comma separated text to the field.
- For example enter: Label, Value, Units for three columns
- Add a line break (return) to start a new row and enter the same number of comma separated values.
- To preview your table click outside the edit field or tab to escape the field.
- The new table will appear below the buttons.
- Feel free to make changes and click out of the field to continue editing
- Once you are done adding your table don't forget to click "Save"


