3. Survey Portal Documentation
Helpful information for users of the Sytewise Survey Portal
Getting Started with Surveys
Here's How to Navigate the Survey Portal and Open a Survey.
Survey Portal Navigation
The Survey Portal is a Survey Vendor's listing of all of the surveys they have pending and ones that they have completed. The Survey Portal also allows a Surveyor to update their User Name, Password, and Company Data.
There are two ways to get to the Log In Screen of your Survey Portal:
- Use the Link http://survey.sytewise.com
- Click on the Login to Do Survey button in the Survey Request Email
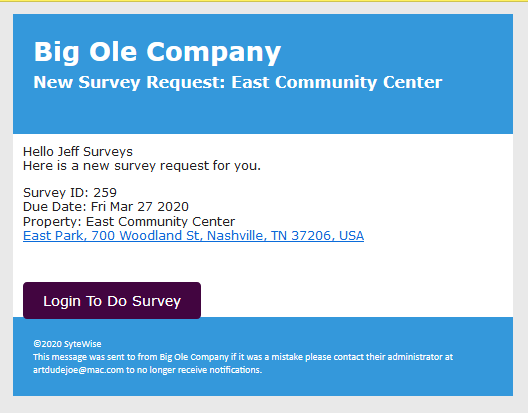
The image above is a the Survey Request email. Notice that it has the Property Name, Address, Due Date, and Survey ID. You can go directly to the Survey Portal login just by clicking the Login To Do Survey button right under the Property Address.
Logging In:
However you choose to get to the Login Screen, login to the Survey Portal using the credentials given to you by your Administrator or the Company Admin that established your Survey Portal access. Enter your User Name and Password and click Enter after reading the Terms and Conditions.
Survey Portal Home Page:
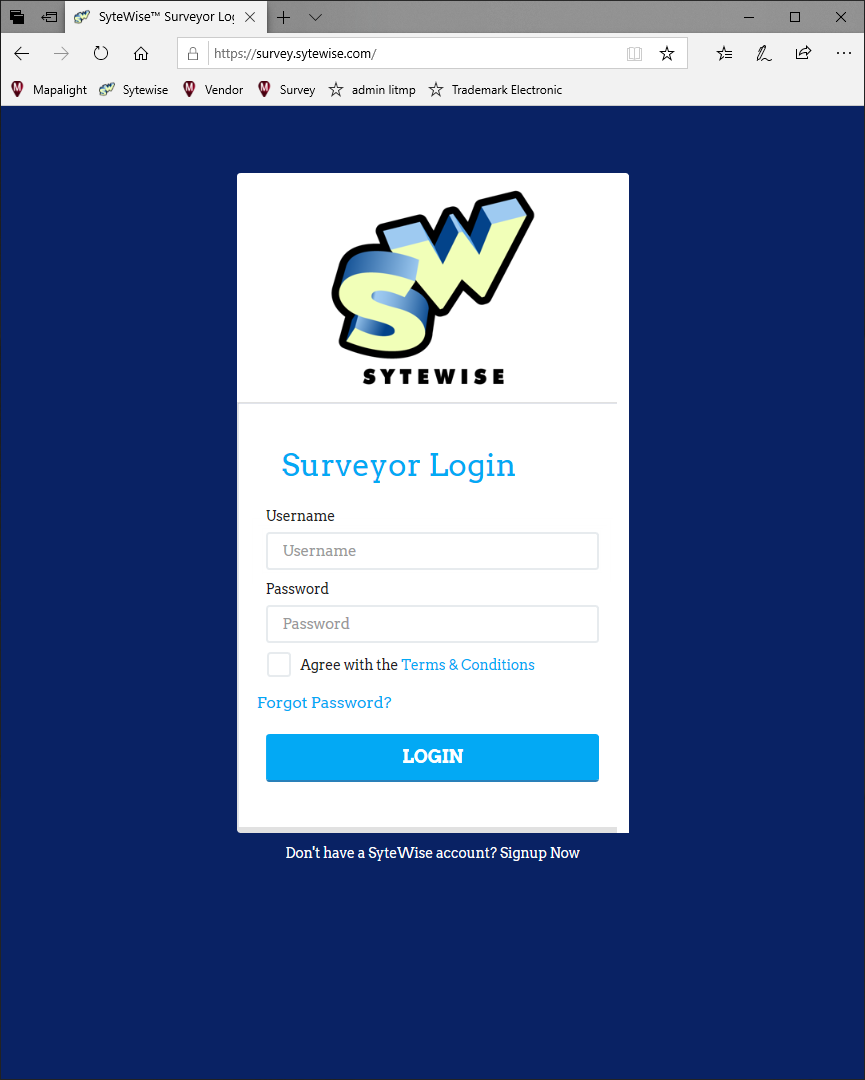
The Survey Portal is your home base for every survey you are asked to complete. Each Survey is an individual item and can be from any Property, for any trade. It is important to know that the Survey keeps a record of every Survey you've done, and the ones you still have to complete. The entire record of your Surveys is included in your portal. It is a great reference for what work you've done and when it was completed.
In the image above you will see the major parts of the Survey Portal Home Screen:
- Survey Company and the User Name of the Surveyor
- The Company that Sent the Survey
- Buttons to Select either the Active or Completed Surveys
- A list of Active Surveys ( Completed Surveys are under the Completed Page)
- Icons at the bottom for the Home Screen, Company and Password Information, and the Exit Icon
The Home Screen is pretty simple to navigate and easy to track down the Survey you want to conduct. When you find the Survey you are ready to complete, click on it or select it from the list.
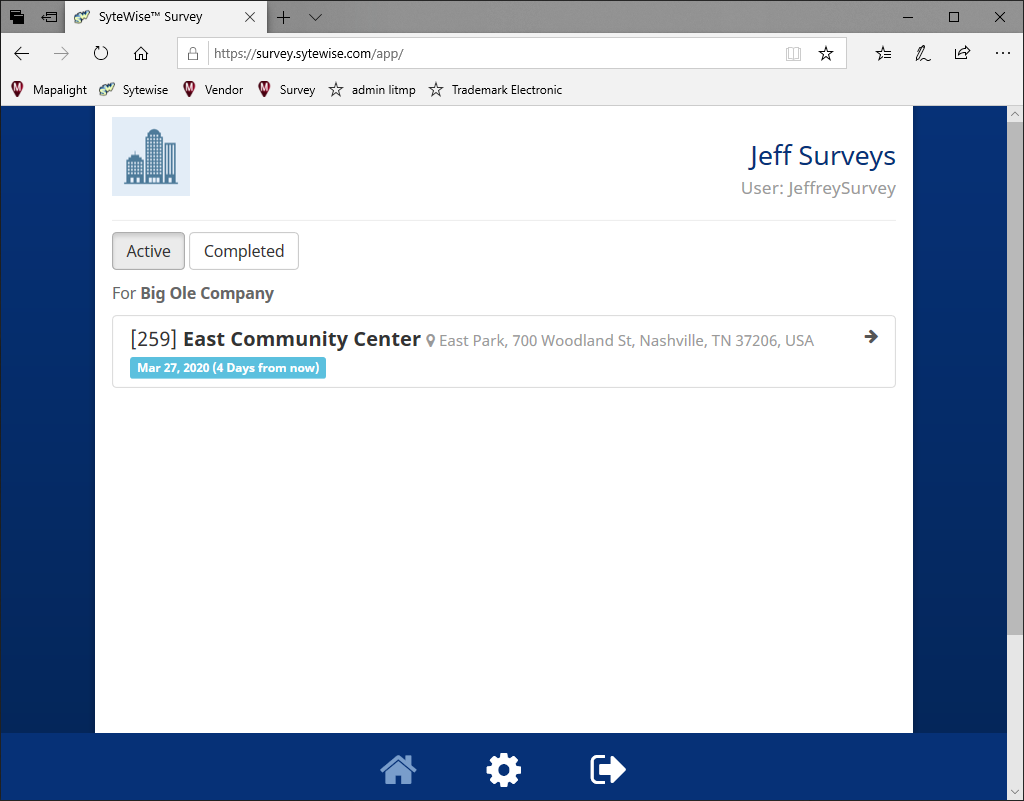
Survey Header and Map Information:
The Image above shows the header and map of an actual Sytewise Survey. Surveys can have different components based on the Trade, so in this example we're showing a simple Lighting Survey to check the Lighting on a property. It has all the basic features of a Survey to get you acquainted with the common elements you will see in any Survey:
- Property Name
- Property Address Link
- Customer Notes from the Admin about this Survey
- An Active Map of the Property Location and the Fixtures to Survey
- Selection Buttons for Fixtures by Height
- Nearby Button to select the Fixtures closest to you
- Finish Button to Complete the Survey and Upload the Results
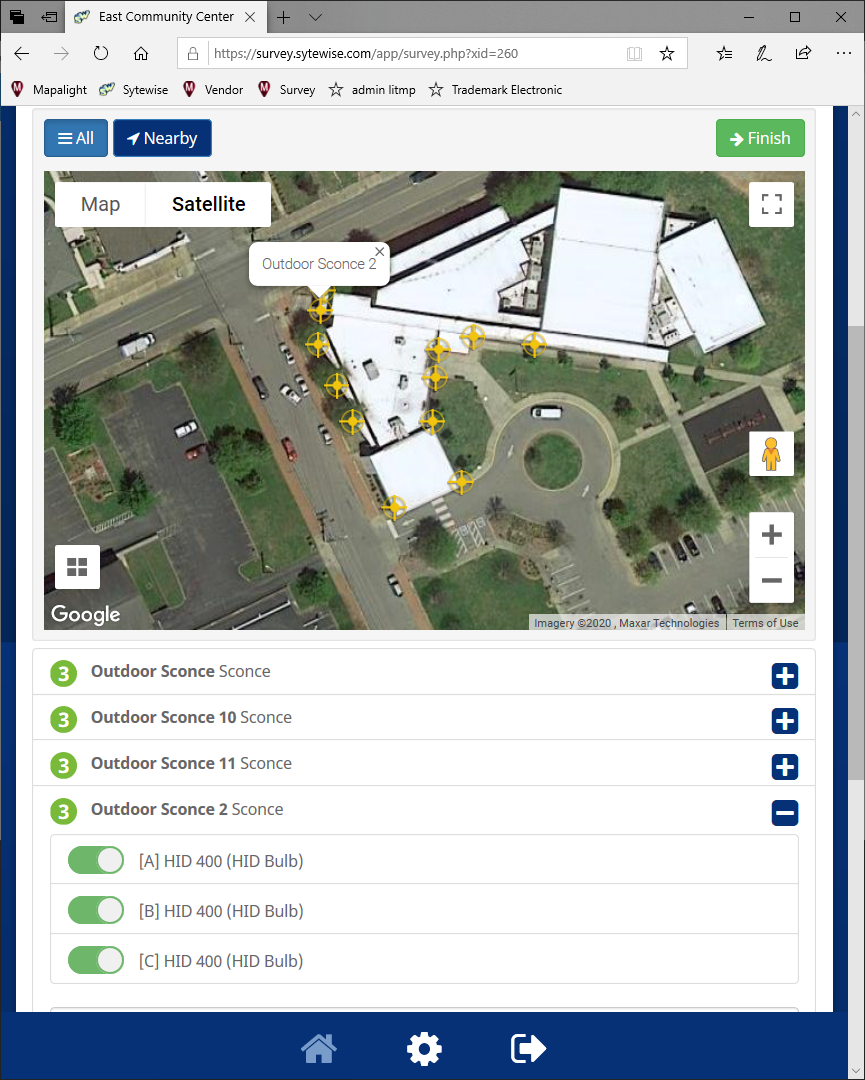
Map and Fixture List:
In the image above you will see a portion of the Fixture Map and a list of Fixtures. Each of the Fixtures has a label that you can view by mousing over with your cursor or by selecting on your wireless device. In this case the user has selected Outdoor Sconce 2.
Each Fixture has a number of parts that can be revealed or hidden by using the +/- icon to the right of the Fixture.
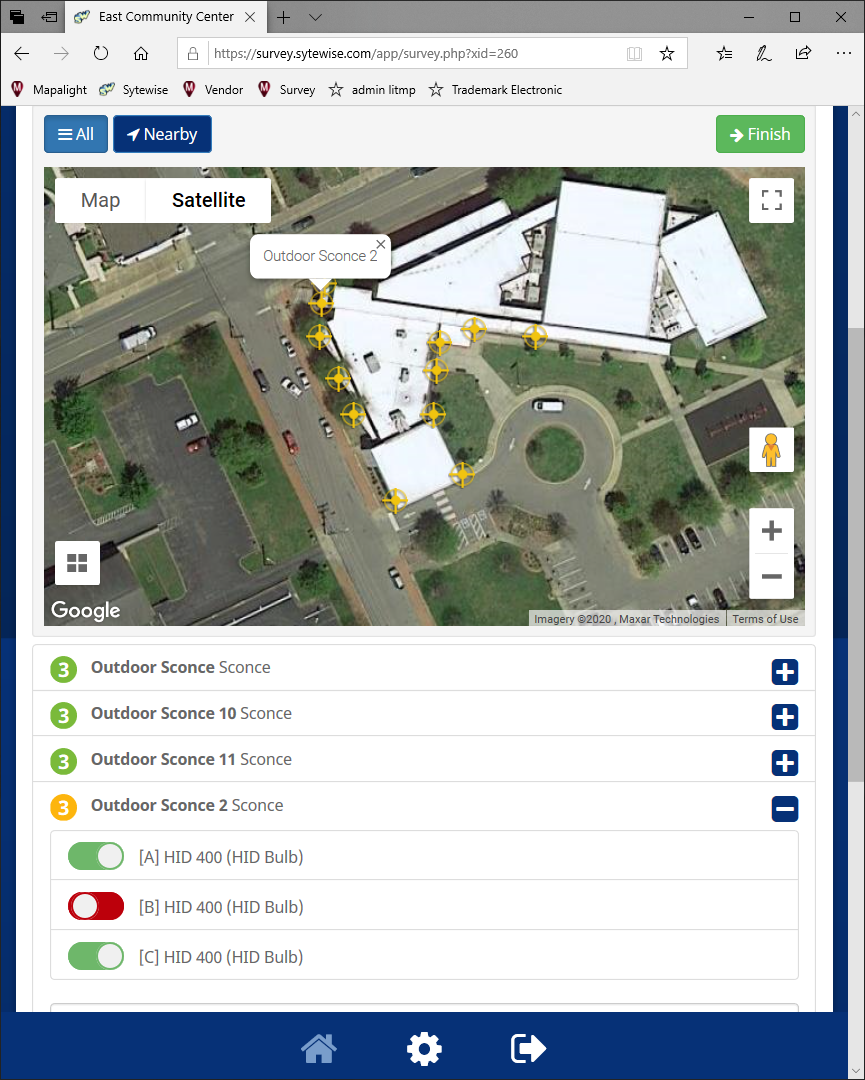
Each Part can be listed as Needing Service simply by toggling the button from Green to Red. In the next image you will see that Lamp B in the Outdoor Sconce 2 Fixture is listed as not burning and needing service.
So that is the breakdown of the Major Common Components of a Survey. Some Surveys may have slightly different forms based on their Trade, but the operation of the Survey Portal will be the same, even if the Form of the Survey is slightly different. Click here to read about how to Fill Out a Survey.
Completing a Survey
Completing a Survey is easy in Sytewise and it starts by finding the Survey you want to complete. When you are ready to complete the Survey you can go to your Survey Portal and look through your list of Active Surveys, or click on the Survey Request email notice you received from your Company Administrator or your Customer..
Either way, Open the Survey and Start the work. In this example we'll be using a Lighting Survey. Lights are a simple survey, easy to complete, and will get you familiar with all of the components of a Sytewise Survey.
Each Survey is listed by Property Name. Make sure you have the correct Survey for the Correct Property from your Active Surveys list and click on it.
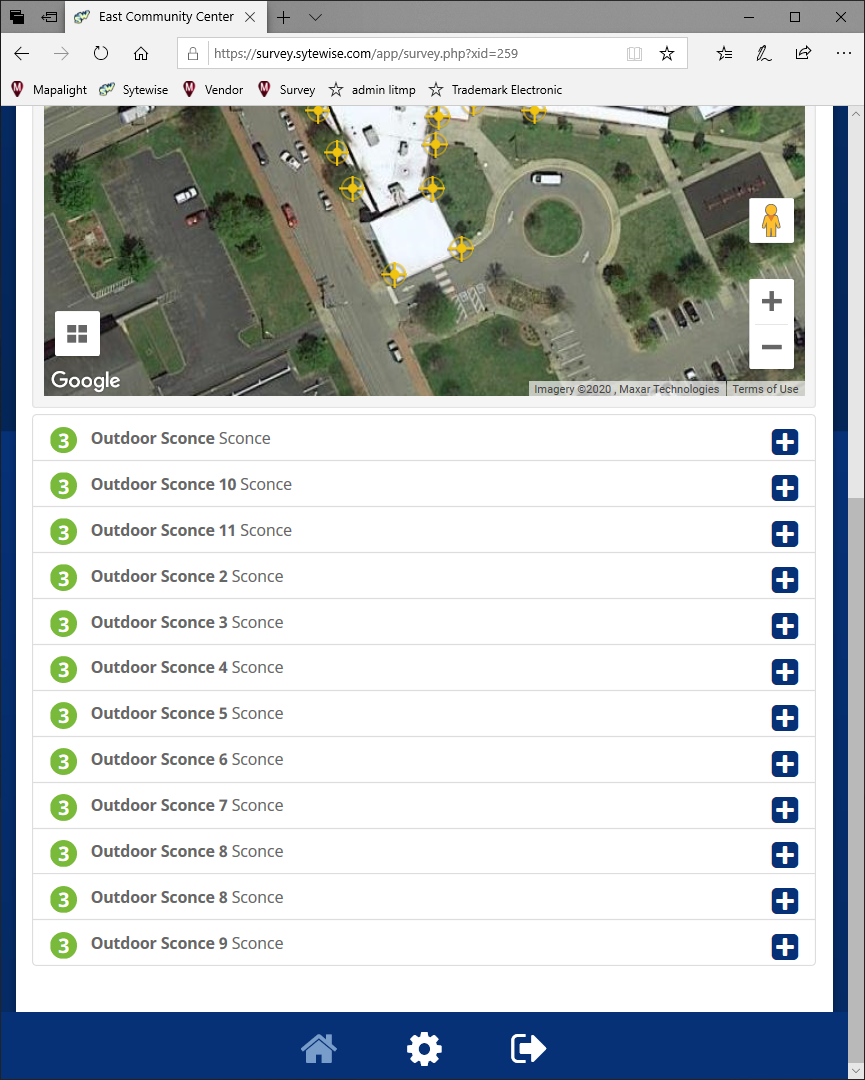
Each Fixture you are to Survey will have an Icon on the Map and be listed in the Fixture List. When you click on the Fixture Icon you will see a label with the Fixture Name. The same fixture will also be highlighted with blue in the Fixture List. This makes it easy to identify the correct fixture in case there are multiple fixtures of the same make and model, such as a Light Fixture or HVAC unit.
Each Fixture will have several parts that can be displayed or hidden by selecting the +/- to the right. Click on the + sign and a list of the parts in the fixture will appear. Click on the - and they will be hidden. Parts can be a physical part of the Fixture such as a lamp in a Pole Light, or it can be an action, such as an Annual Test for a water Backflow device.
Each Part will have a Green/Red Switch that can be flipped to the opposite color by clicking with a mouse or touching the button on your wireless device. Green means the Part is operational. Red means the part need service.
As you complete a Lighting Survey, every lamp that isn't burning needs the status button to be selected from Green to Red. The same would be true for any other type of Survey. If the part needs service.