Creating and Managing Fixtures
A fixture is the unit of work in Sytewise. Properties hold trades, trades hold fixtures, and fixtures are where the actual equipment lives: the lights, the HVAC units, the AV systems, the access points, the cameras, or whatever physical asset you're tracking and maintaining. Getting fixtures built accurately is what makes work orders, surveys, checklists, and reports meaningful. This article covers every way to create a fixture, how to delete one, and what to think about before you do.
Finding the New Fixture Form
Fixtures are created from the property detail page. Open the property, navigate to the trade where the fixture belongs, and look for the New Fixture button in the fixtures section. The modal that opens has two tabs: New Fixture for building one from scratch and Add From Library for deploying a saved template. There is also a separate Import option for bulk creation from a CSV file, and a Clone option for copying an existing fixture within the same property.
Creating a Fixture by Hand
The New Fixture tab has four fields.
Fixture Name is required and should be short and specific. The form even suggests the format: "Pole Light 1" or similar. This name appears in the fixture list, in work orders, in surveys, and in reports. A name that makes sense in isolation, without needing the surrounding context to interpret it, is worth the extra thought up front.
Description is also required and gives you room to add more detail. Where the name is a label, the description is a sentence. "Northwest corner LED pole light on Circuit 4" tells the next technician something useful.
Type is a dropdown populated from the fixture types configured in your account. Fixture types represent categories or classifications for your equipment, such as height classes for outdoor lighting or equipment categories for AV systems. If the type you need isn't in the list, it needs to be added by an account administrator before you can use it.
Vendor is pre-filled with the default vendor for this property/trade combination. If a different vendor is responsible for this specific fixture, search by name and select the right one.
Click Save and you land on the fixture detail page. From there you can add parts, position the fixture on the map or floor plan, add images, and assign it to a group. The fixture starts with zero parts, a blank status, and its position set to the property's center coordinates. Repositioning it right away is a good habit before the list gets long.
Positioning a Fixture
Every fixture needs a position on the property map so it can be identified visually alongside its neighbors.
GPS-based based trades use Google Maps. The fixture marker starts at the property's center point and can be dragged to the correct location. Click and hold the marker on the map and move it to where the fixture actually lives. The coordinates update automatically when you drop it.
Floor plan based trades use an uploaded image of the building or site layout instead of a map. The fixture marker appears on that image and is dragged into position the same way. This mode is common for interior spaces where GPS coordinates don't distinguish one room from another.
Which mode a trade uses is set at the trade level on the property. All fixtures within a trade share the same positioning system.
Creating a Fixture from the Library
If a fixture you need to add is the same as or very similar to one you've already built and documented elsewhere, the library saves you from rebuilding it from scratch.
Click New Fixture and switch to the Add From Library tab. A list of saved fixture library items appears as radio buttons. Each item represents a complete fixture snapshot including all its parts, specifications, and technical detail. Select the one that matches what you're installing, set the Parts Install Date (which becomes the installation date recorded on every part created from the template), and click Add From Library.
The system creates the fixture and all its parts in one operation. Every part field from the library item, part number, description, manufacturer, model number, firmware versions, and all technical detail fields, is copied to the new fixture. The install date you entered is applied to each part record.
The Include Groups checkbox is worth knowing about. If the library item was part of a group when it was saved, checking this box recreates that group association on the new fixture. Leave it unchecked if you want the fixture to start ungrouped and organize it later.
After creation you land on the fixture detail page with a fully built part inventory already in place. The main thing to do immediately is position the fixture on the map, since it will be sitting at the property center point until you move it.
Saving a Fixture to the Library
To save a fixture to the library, go to the fixture detail page and click the Library button in the parts section. Enter a library title up to 24 characters and click Save. Everything is captured: the fixture definition, every part record with its full specifications, wiring diagrams, and group associations. That snapshot becomes available immediately on the Add From Library tab for any fixture on any property in your account.
The library title is what you'll be selecting from a list later, so make it descriptive. "Standard 20ft LED Pole w/ Driver" or "Samsung 3x4 ION Wall v2.1" will serve you better than something generic.
Cloning a Fixture
Cloning creates an exact copy of an existing fixture within the same property. It's the right tool when you have multiple identical or nearly identical fixtures at the same location and don't want to enter the same specifications repeatedly.
Select the fixture you want to clone from the property fixture list (the checkbox next to the fixture row), then click Clone. A small modal asks for the new fixture name. That's it. Everything else, description, type, vendor, all parts with their full specifications, and group memberships, copies from the original.
Cloned parts are initially marked with "CLONE" in the part number, signaling that they need to be updated with the actual serial or part numbers for the specific units being documented. The fixture drops at the property center point, so reposition it on the map as soon as it's created.
Clone is different from the library in one important way: cloning works within a single property in the moment, while the library persists configurations for use across properties and over time. For adding the second of two identical fixtures on the same site, clone is faster. For deploying the same fixture configuration across twenty properties, the library is the right tool.
Importing Fixtures from a CSV File
When you have a large number of fixtures to add to a property at once, the import tool lets you upload them all from a spreadsheet.
The import modal accepts a CSV file with one fixture per row. The columns, in order, are:
- Fixture Title (required, minimum three characters)
- Fixture Description (defaults to the fixture title if left empty)
- Total Parts in Fixture (required, between 1 and 50)
- Part Number (defaults to the fixture title if left empty)
- Part Description (defaults to the part number if left empty)
- Part Position (optional)
- Part Manufacturer (optional)
- Part Model Number (optional)
- Fixture Height in Feet (required, as a whole number)
A sample CSV file is available to download directly from the import modal so you can see the exact format before building your file. The import also has a checkbox for "First row is a header row, so ignore it" in case your spreadsheet includes column headers.
After you upload the file, Sytewise shows you a summary table of what it parsed. Any rows with errors are highlighted so you can correct them before committing. If everything looks good, click Finish Import to create all the fixtures at once. All imported fixtures start at the property center point and will need to be repositioned.
The import is best suited for properties with a large number of uniform fixtures where the basic data (name, type, part number) is already organized in a spreadsheet. It creates one part per fixture based on the single row of part data provided. For fixtures with multiple parts or complex specifications, adding parts individually after import gives you more control.
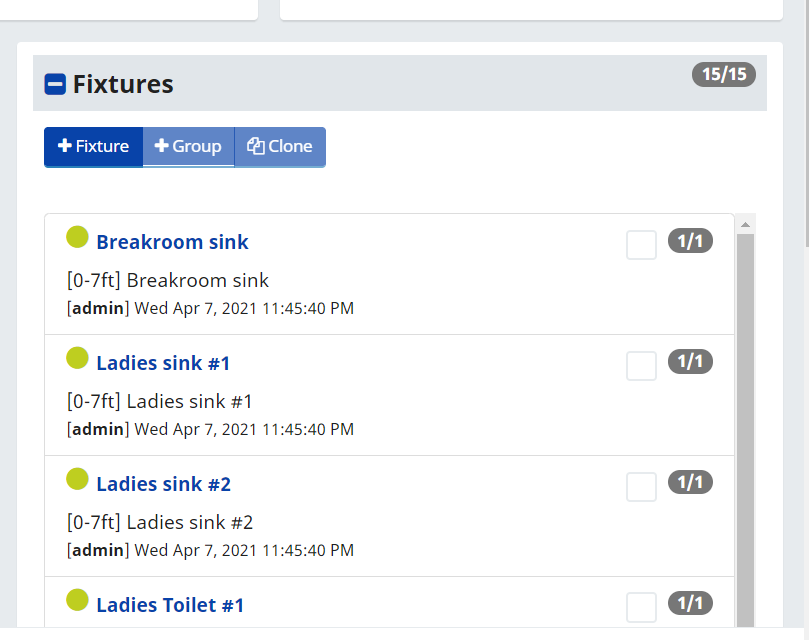
Fixture Groups
Fixtures can be organized into groups within a property. Groups are useful for representing physical clusters of equipment: a bank of lights on a single circuit, the displays on one wall of a venue, or the HVAC units serving a specific zone.
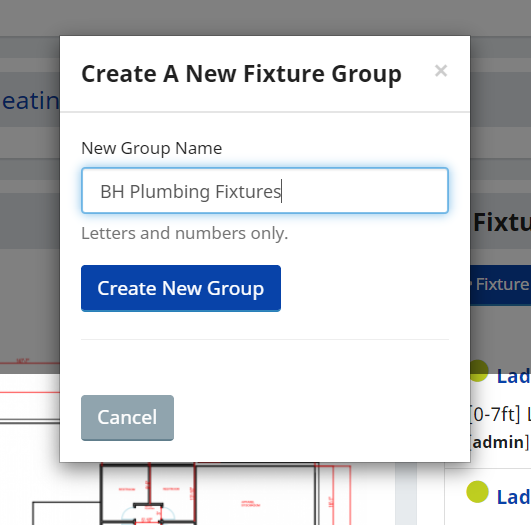
To add fixtures to a group, select them using the checkboxes in the fixture list and open the group modal. You can either create a new group name or add the selected fixtures to an existing group. A fixture can only be in one group at a time.
Group names are stored in lowercase with spaces and dashes converted to underscores. Keep them short and descriptive since they appear as labels on the property map.
Select the checkbox next to each fixture that you would like in the Group.
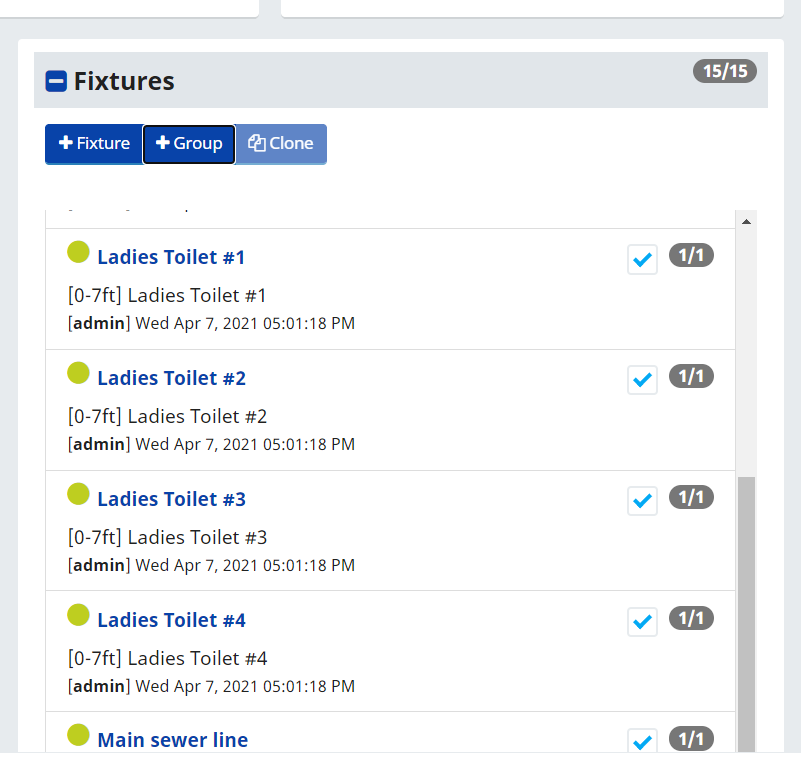
Once you select a Fixture you will notice that the +Group button become active. Select the Group button and type in the Name of the Group for the list of Fixtures you have selected.
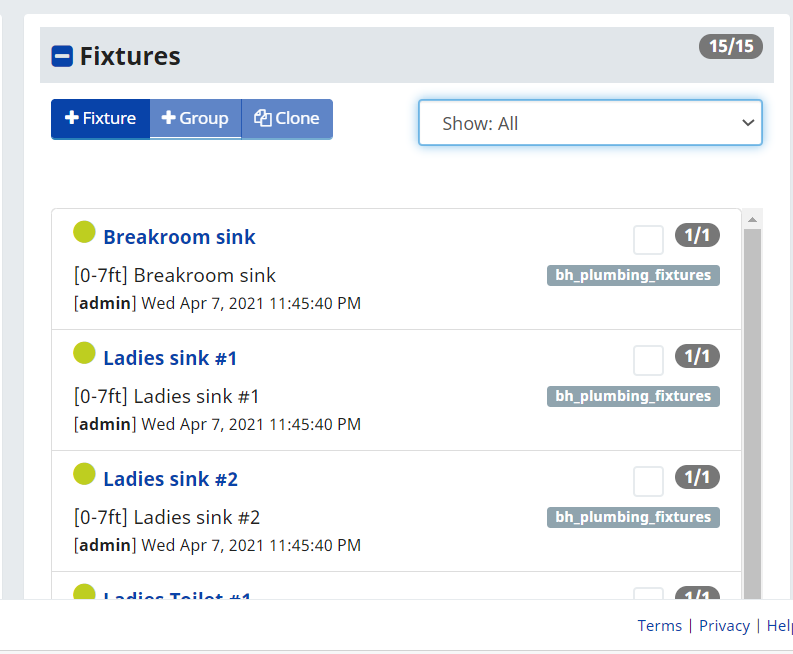
Click Save. Now you can view just the items in that group by selecting it from the Group Selection pull down menu and the presence of a Group title just beneath the Selection box.
Deleting a Fixture
Deleting a fixture is done from the fixture list on the property detail page. Select the fixtures you want to remove using their checkboxes and click the delete action. Sytewise uses soft deletion, meaning the fixture record is marked inactive rather than permanently erased. The fixture disappears from the active list but its history, logs, and associated records remain in the database.
A few things to know before deleting:
Parts are not deleted. The parts inside a deleted fixture become orphaned in the database. They don't disappear, but they're no longer accessible through the fixture's detail page. If the part records contain important documentation or history, consider whether the fixture should actually be deleted or simply left inactive.
Work orders and checklists are not automatically cleaned up. Any open work orders or checklists that referenced the fixture remain in the system but lose their connection to an active fixture record. Close out or reassign those items before deleting the fixture if clean records matter.
Group memberships are cleaned up. When a fixture is deleted, its group association is also marked inactive, so it won't leave behind a ghost entry in the group.
There is no built-in undelete. The soft-delete approach means recovery is technically possible at the database level, but there is no UI to restore a deleted fixture. Delete if you are confident that you're done with the fixture, such as being replaced or abandoned.
The practical guidance: if a fixture is being replaced, update its parts to reflect the new equipment rather than deleting it. The fixture record and its history are more valuable than a clean list. Delete when a fixture genuinely no longer exists at the property, not just because it was serviced or upgraded.
Additional Reading: ADDING PARTS TO FIXTURES, CHECKLIST TEMPLATE, PROPERTY PAGE